Connecting to the controller
Assigning the controller
To be able to transfer a project to the controller, you must first connect PLCnext Engineer to the controller. To do this, proceed as follows:
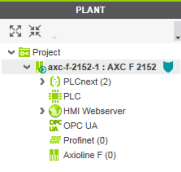
- Double-click the Project (x) node in the PLANT area.
↪ The Project editor group opens. - Select the Online Devices editor.
- Select the appropriate network card from the drop-down list.

You can show and hide more detailed information by clicking on the arrow next to Name of station (Project) or Name of station (Online).
- Click on the
 button to search the network for connected devices.
↪ You can see the configured devices under Name of station (Project).
↪ You can see the devices that have been found online on the network ("online" devices) under Name of station (Online:

↪ If you select the device in the Name of station (Online) column then the device found on the network (the "online" device) receives the IP settings of the configured controller.
↪ If you select the device in the Name of station (Project) column then the configured device receives the IP settings of the "online" device found on the network. - Select the desired device.
Note: If the IP address of an "online"device found in the network already matches the IP address of the configured controller, the "online" device is automatically assigned to the configured controller. In this case, you do not need to select the desired device for the assignment.
↪ The icon in the Status column indicates that the assignment was successful, so the configured device has now been assigned to an "online" device:

Opening the connection
Once the configured controller has been assigned to an online device, you can connect PLCnext Engineer to the controller:
- Double-click the controller node in the PLANT area.
↪ The controller editor group opens. - Select the Cockpit editor.
- Click on the
 button to connect PLCnext Engineer to the device.
↪ The SECURE DEVICE LOGIN dialog opens.
↪ From firmware 2020.6 on, a system use notification will be displayed. See System use notification for details. - Enter your user name and your password; in the default state of the device, this is:
User name:admin
Password: is printed on the device's housing.
↪ The icon next to the controller node in the PLANT area indicates that the connection is established.

See also
- User interface
- Creating a new project
- Configuring the IP settings
- Configuring Axioline F modules
- Configuring PROFINET devices
- Configuring PROFINET controller and device
- Programming in IEC 61131-3 languages
- Instantiating a program
- Assigning process data
- Specifying the refresh interval for Axioline F I/O data
- Transferring a project to the controller
• Published/reviewed: 2026-02-13 ☃ Revision 089 •