Configuring the IP settings
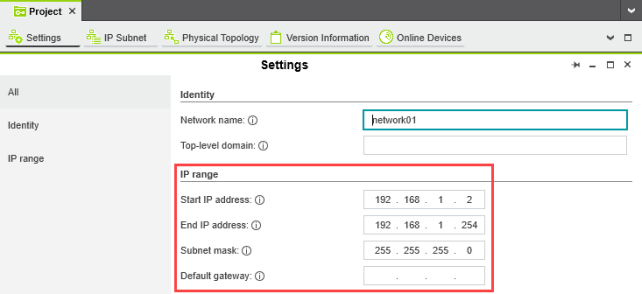
Setting the IP address range
- Double-click the Project (x) node in the PLANT area.
The Project editor group opens.
- Select the Settings editor.
- Set the desired IP address range and the subnet mask for the project.

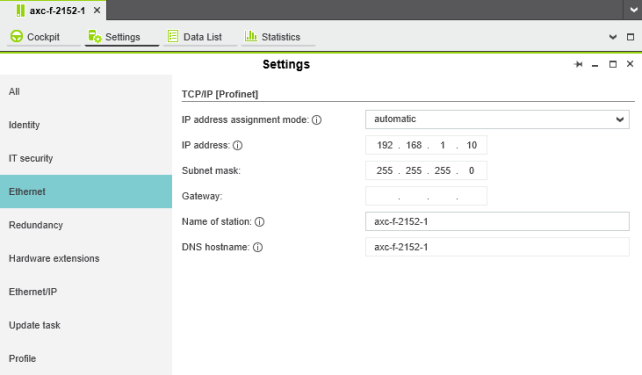
Setting the IP address
- Double-click the controller node in the PLANT area.
The controller editor group opens.
- Select the Settings editor.
- Select the Ethernet view.

The IP address of the controller can be set automatically or manually. The IP address is assigned to the controller when you have connected PLCnext Engineer to the controller, see Connecting to the controller.
Setting the IP address automatically
- Select automatic in the IP address assignment mode drop-down list.
PLCnext Engineer automatically assigns an IP address to the controller from the set IP address range (see Setting the IP address range) as soon as a connection to the controller is established (see Connecting to the controller).
Setting the IP address manually
- Select manual in the IP address assignment mode drop-down list.
- Enter the IP address, subnet mask, and gateway in the respective input fields.
PLCnext Engineer assigns the manually set IP address to the controller as soon as a connection to the controller is established (see Connecting to the controller).
See also
- User interface
- Creating a new project
- Connecting PLCnext Engineer to the controller
- Configuring Axioline F modules
- Configuring PROFINET devices
- Configuring PROFINET controller and device
- Programming in IEC 61131-3 languages
- Instantiating a program
- Assigning process data
- Specifying the refresh interval for Axioline F I/O data
- Transferring a project to the controller
• Published/reviewed: 2026-02-13 ☃ Revision 089 •