Creating functions and function block libraries written in C++
Available from 2023.0 LTS of the PLCnext Technology Toolchain
This topic describes the general approach to program functions and function block libraries in C++ for use with PLCnext Engineer.
This feature is based on Shared Native Libraries and is a combination of C++ implementation and C# wrapper. The PLCnext Technology Toolchain supports Shared Native Libraries with a Microsoft® Visual Studio® IDE template, or on the command line via the PLCnext CLI.
Prerequisites
- Have a rough understanding of C++ programming in PLCnext Technology and for real-time applications.
- Check if the required installations are done.
- Use at least MSBuild version 16
- For C++ programming, have at least one SDK for a PLCnext Control installed.
- Optionally Visual Studio® IDE can be used; for this the extensions for C++, C# and Shared Native Libraries need to be installed. Make sure to have the workbench prepared properly.
Additionally you need to set the MSBuild path for the PLCnext CLI. MSBuild can either come from your Visual Studio® installation (e.g. C:\Program Files\Microsoft Visual Studio\2022\Professional\MSBuild\Current\Bin\MSBuild.exe) or as a separate installation of the .Net™ SDK for Linux® and Windows®.
The MSBuild.exe must be available in the system's PATH variable, can be set as a parameter on generate/build, or is set as a fixed path for the PLCnext CLI like this example:
plcncli set setting MSBuildPath "C:\Program Files\Microsoft Visual Studio\2022\Professional\MSBuild\Current\Bin\MSBuild.exe"
If several MSBuild versions are available in the system path, make sure the highest version comes first, or set a fixed path in the PLCnext CLI.
Creating a Shared Native Library project with Visual Studio®
-
Create a new project
- On the Visual Studio® start-up screen select Create a new project; or alternatively in the Visual Studio® workbench, from the top menu bar, open File → New → Project….
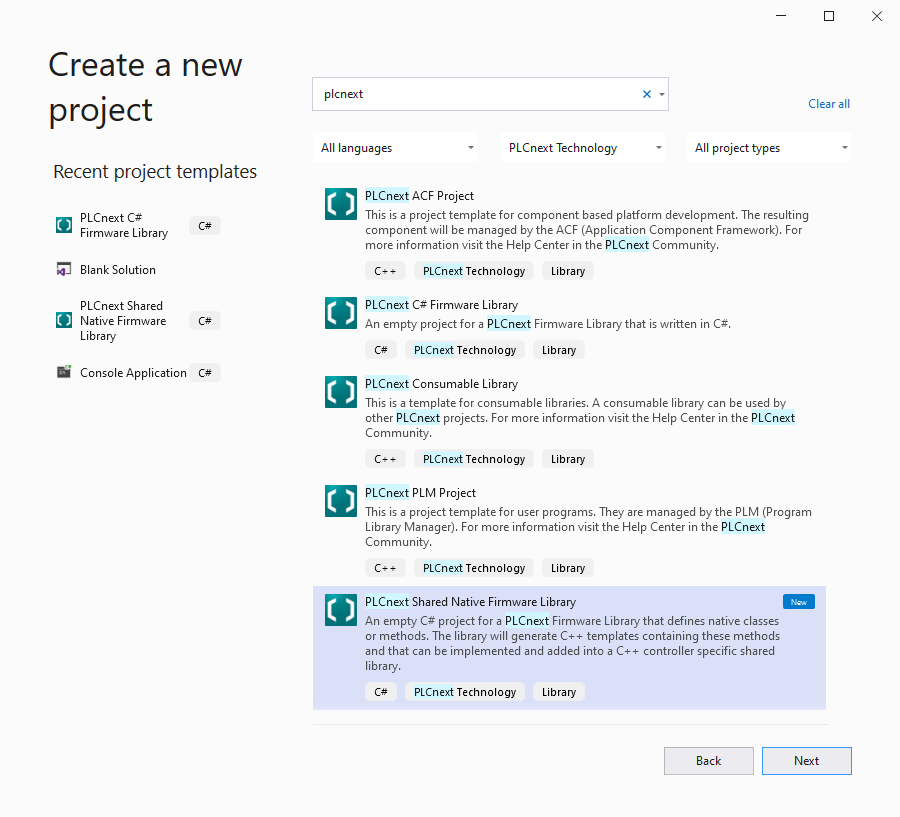
- In the search field at the top, type plcnext to set a filter; then double-click the PLCnext Shared Native Firmware Library entry appearing in the list.
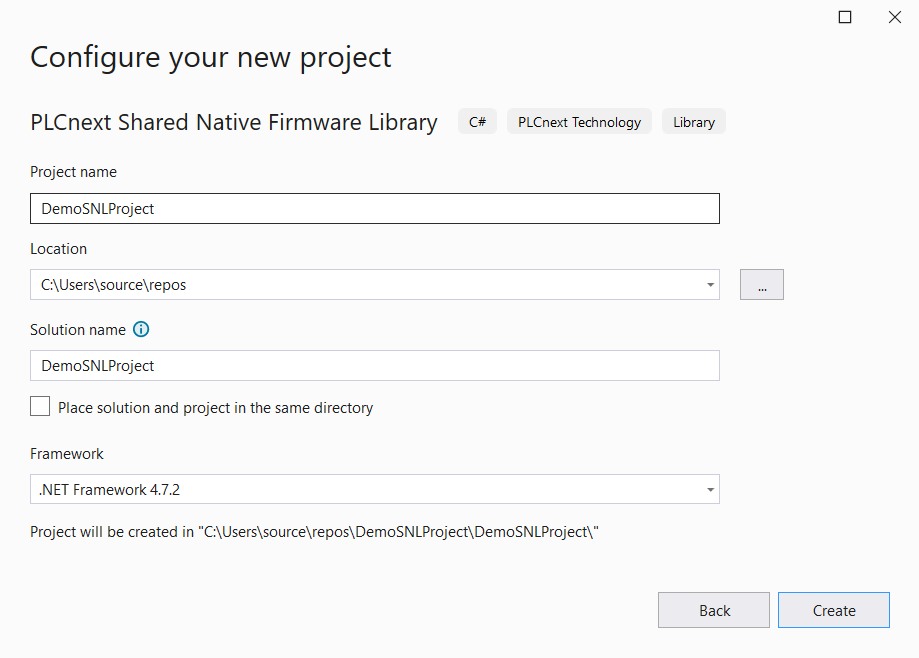
- Type in your project name, select a storage location and click Create.
- In the next dialog window, type in a C++ project namespace and select at least one installed SDK for which the C++ part will be build. This setting can be changed later in the project properties.
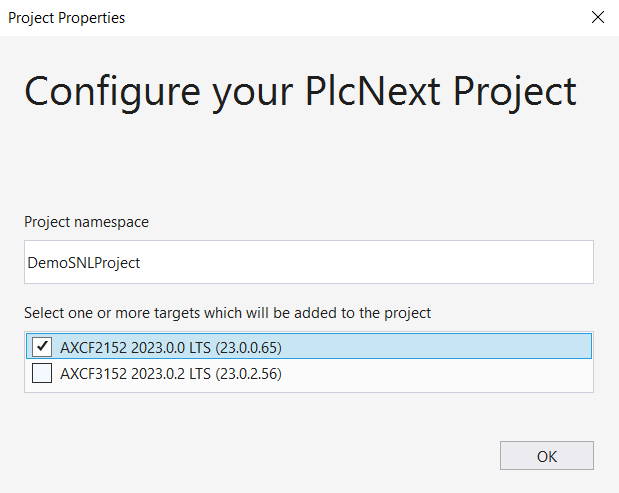
- Click OK to add the Native Function or Native Function Block. This procedure can take a bit longer when executed for the first time.
-
Add new code sheets
With the Shared Native Library extension, the PLCnext Native Function and PLCnext Native Function Block code sheet templates are available. To use a template, proceed as follows:
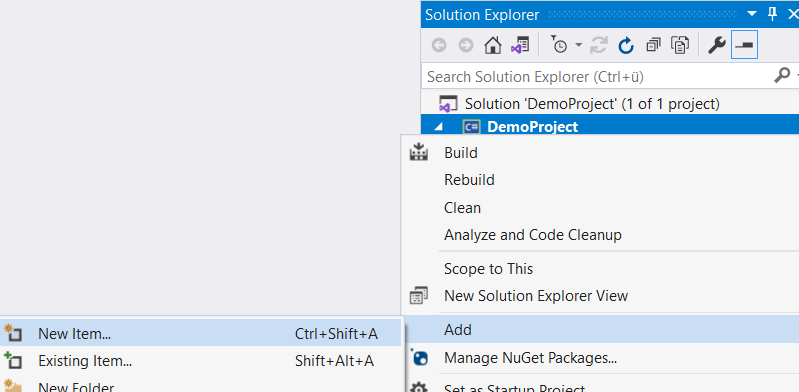
- In the Solution Explorer, right-click on your project.
- Select Add → New Item….
- In the left tree, select Visual C# Items → PLCnext Technology and then one of the templates:
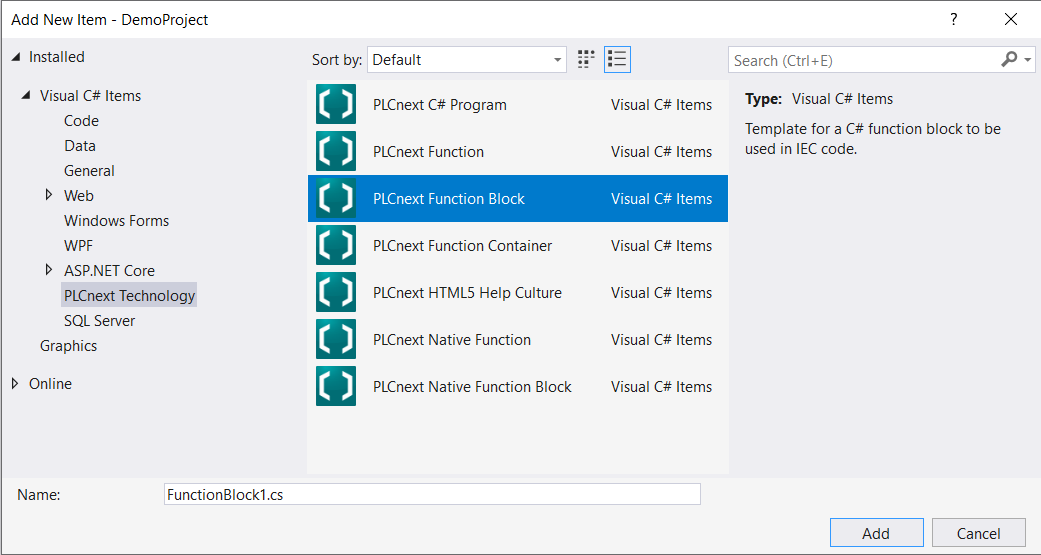
- PLCnext Native Function: Template for a function to be used in IEC 61131‑3 code.
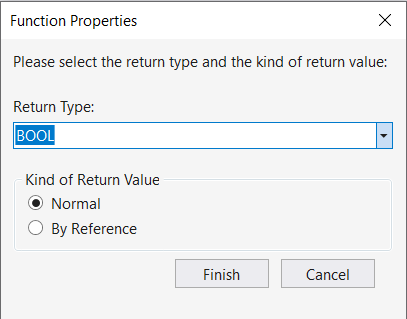
In the dialog that is popping up, select a return type and define the value:
Return Type
Here you can pop up a table of supported data types in an overlay window, showing the data types in C# programming on PLCnext Technology and their correlations to data types in IEC 61131‑3 or C++ programming.
Kind of Return Value
By Reference is recommended for complex data types, and is mandatory for generic data types (ANY). - PLCnext Native Function Block: Template for a function block to be used in IEC 61131‑3 code.
- PLCnext Native Function: Template for a function to be used in IEC 61131‑3 code.
- Name your function or function block properly (renaming isn't easy!) and press Add.
↪ A default code sheet for the selected type of element is created, and the corresponding C++ header and a code sheet are generated automatically.
-
Define the interface
The interface for your functions and function blocks will be defined in C# and then generated into some template files. These templates will be used in the C++ project for implementation and building a PLCnext Engineer library file.
(Note: The generator that is executed in this step cannot be run under Linux®; as a temporary workaround, use a Windows® environment for this step).- In the C# project, open the .cs file you just created.
- Add the inputs and outputs to the public class like in normal PLCnext C# projects.
- To set the Visual Studio® build output to
normalfor getting get necessary information, go to Tools → Options... → Projects and Solutions → Build And Run, and change MSBuild project build output verbosity to Normal. That is, because the toolchain does not automatically add the changes to the C++ project to avoid issues with a potential implementation, and this way you're getting a list of files to check afterwards. - To make the variables available in C++, right-click on the C# project in the Solution Explorer and select PLCnext Technology → Generate.
↪ TheBuild Output logwill show a message like this: The file DemoProjekt1-cli32.h differs from DemoProjekt1CSharp\Cli\DemoProjekt1-template3.h and needs to be updated manually.
The file DemoProjekt1-cli64.h differs from DemoProjekt1CSharp\Cli\DemoProjekt1-template64.h and needs to be updated manually.
The file NativeFunctionBlock1-cli.cpp differs from DemoProjekt1CSharp\Cli\NativeFunctionBlock1-template.cpp and needs to be updated manually.
Successfully generated all files for C:\Users\source\repos\DemoProjekt1\DemoProjekt1\DemoProjekt1Cpp. - Open the new generated <projectname>-template3.h and <projectname>-template64.h header files located in the C# project in the CLI folder and compare them to the <projectname>-cli32.h and <projectname>-cli64.h in the C++ project.
- Add the differences from the template to the CLI file. Note: Usually, comments do not matter but leaving them out will result in the above message on each build. So better add the comments, too. Even if you have done all implementation, the last message will still appear, but should never be just ignored on any interface changes.
-
Create the code
- Open the new C++ project code sheet <function or function block name>-cli.cpp that has been added during code generation.
- Create the code for the function or function block and use the port variables; e.g.:

- Create the Shared Native Library and PLCnext Engineer Library by building the C++ project.
↪ A *.pcwlx library is being stored in bin directory of the C++ project. - Proceed with importing the library into PLCnext Engineer to use your function or function block in an automation project.
Creating a Shared Native Library project with the PLCnext CLI
The same procedure as described above for working with Visual Studio® can be done without an IDE, just by means of the PLCnext CLI.
-
Create a new project
- Navigate to your workspace folder and create a new project which can contain several functions and function blocks for IEC 61131‑3 by using the command
plcncli new snproject -n "<ProjectName>"; e.g.:

↪ A project folder and two child projects are created, one for the C# interface and one for the C++ implementation. - Enter the C++ project folder e.g. by issuing the command
cd MyFBProject/MyFBProjectCpp - Add one or more target SDKs to your project;
e.g., an AXC F 2152 SDK for firmware version 2023.0 LTS is added by issuing the commandplcncli set target --add -n axcf2152 -v 2023.0
- Navigate to your workspace folder and create a new project which can contain several functions and function blocks for IEC 61131‑3 by using the command
-
Add new code sheets
Two more templates are available for the CLI, the Native Function (
snfunction) and Native Function Block (snfunctionblock).- Use the terminal still open in the C++ project folder
- Use the command
plcncli new snfunctionblock -n "<name for the FB>"; e.g.

-
Define the interface
The interface for your Functions and Function Blocks will be defined in C# and then generated into some template files. These templates will be used in the C++ project for implementation and building the PLCnext Engineer library.
- In the C# project, open a new .cs-file.
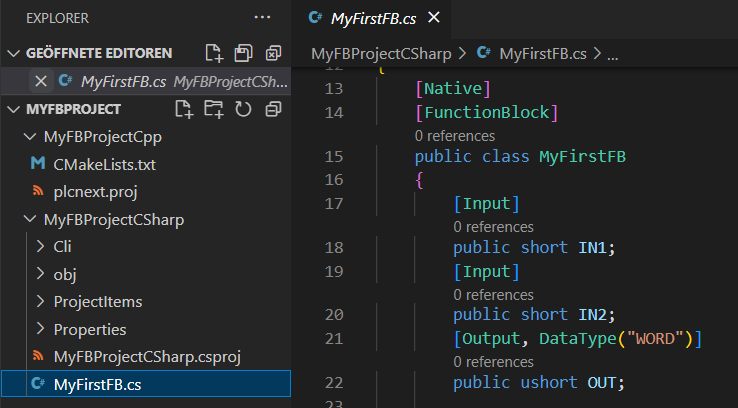
You will find a class with theNativeand theFunctionBlockattribute, containing already some fields with input and output attributes. - Configure the inputs or outputs (and add more) according to the PLCnext C# attributes examples.
- Use the terminal still open in the C++ project folder to run
plcncli generate code(Note: The generator that is executed in this step cannot be run under Linux®; as a temporary workaround, use a Windows® environment for this step).
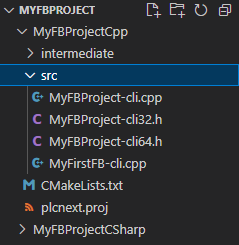
↪ New files will be generated automatically and added to the C++ project'ssrcfolder:
- For changes in an already set up interface (e.g., a
public ushort OUT2;is added to the MyFirstFB.cs):- In the terminal still open in the C++ project folder, run
plcncli generate code(Note: The generator that is executed in this step cannot be run under Linux®; as a temporary workaround, use a Windows® environment for this step).
↪ Warnings will appear when code generation is done:

- Compare the mentioned files to each other. Most times it is just one row for each added input or output which need to be added to the *-cli32.h and -cli64.h files. The implementation code in the .cpp can be ignored, but the file should be compared as well.
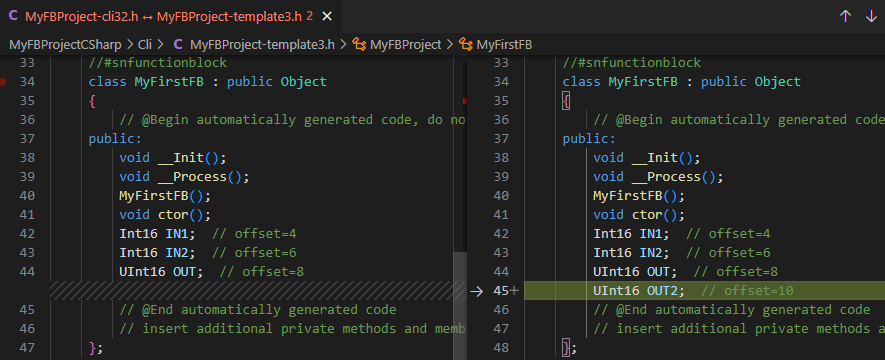
- In the terminal still open in the C++ project folder, run
- If a new Function or Function Block is added:
- In the terminal window that is still open in the C++ project folder, run
plcncli generate code(Note: The generator that is executed in this step cannot be run under Linux®; as a temporary workaround, use a Windows® environment for this step).
↪ For each new function or function block a new *.cpp will be generated and copied to the C++ project for the implementation.
↪ Warnings will appear at the end of the generate for the new interface(s).

- Compare the mentioned files to each other and add the difference manually. In this case a whole new class for the new function or function block need to be added to the *-cli32.h and *-cli64.h. The implementation code in the .cpp can be ignored, but the file should be compared as well.
- In the terminal window that is still open in the C++ project folder, run
- In the C# project, open a new .cs-file.
-
Create the code
- In the C++ project a new code sheet <function or function block name>-cli.cpp will be added
- Create the code for the function or function block and use the port variables, e.g.:

- Create the Shared Native Library and PLCnext Engineer Library by building the C++ project.
- In the terminal window still open in the C++ project folder, run
plcncli build all, and thenplcncli deploy.
↪ A *.pcwlx library is being stored in thebindirectory of the C++ project. - Proceed with importing the library into PLCnext Engineer to use your Shared Native function or function block in an automation project.